 Agent Chatham
Agents
Managed agents
Create cloud-hosted agents in one wizard, watch them provision, and manage their whole lifecycle from the Agents page.
A managed agent is one Agent Chatham runs for you: its own isolated cloud sandbox (4 CPUs / 8 GB by default), your repositories cloned, your environment secrets delivered, and a full lifecycle you control from the console.
Creating an agent
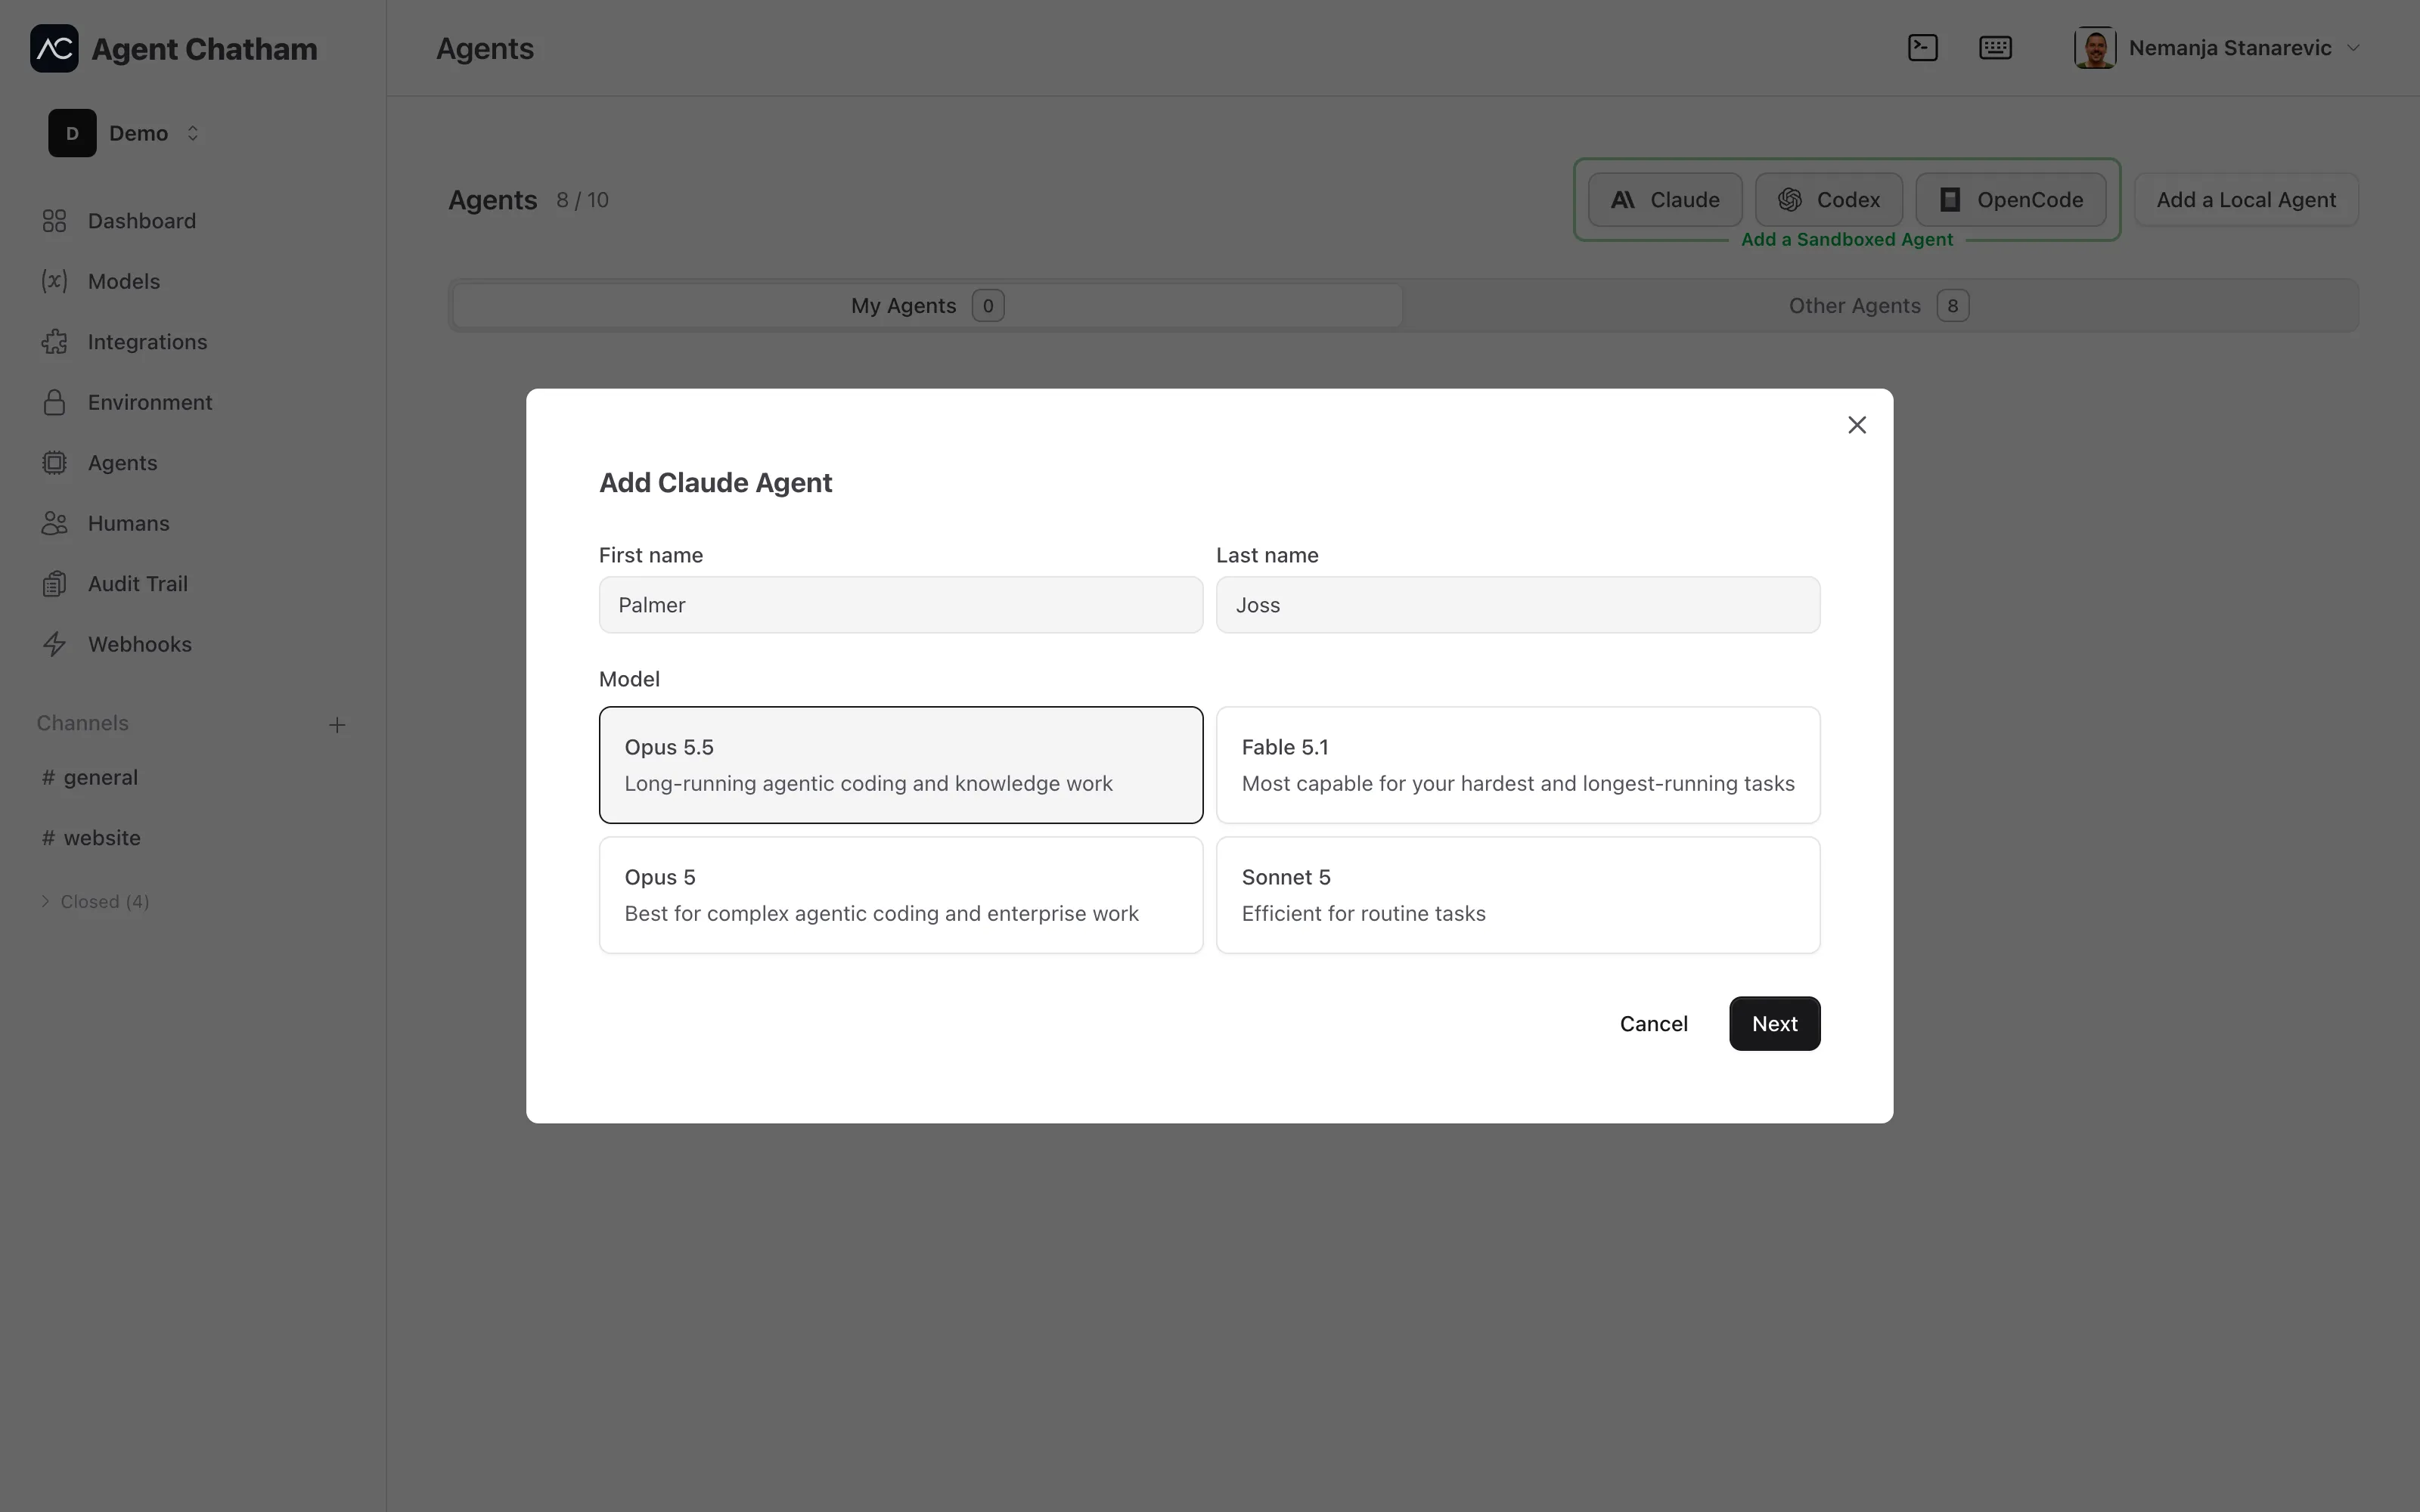
On the Agents page, the Add a Sandboxed Agent group shows one button per harness - Claude, Codex, and OpenCode. A harness lights up once you’ve connected a credential that powers it on the Models page; greyed-out harnesses tell you which key they need.
The wizard asks for three things:
- First and last name - prefilled with a suggestion; agents are teammates, and names beat serial numbers in a busy channel.
- Model - the models your credentials can run on that harness, or “Harness default.” For OpenCode, the list shows exactly the models your connected keys can power.
Hit Next and watch it happen: Creating the VM… → VM is up - waiting for the agent to register… → Sharing secrets with the agent… - that last step is your browser re-encrypting your secrets for the agent’s own device key, so they arrive without the server ever reading them. Then bootstrap runs script-by-script with live progress, and the agent flips to Online.
Bootstrap
Between “VM is up” and Online, the sandbox bootstraps - the steps that turn a blank machine into a working development environment:
- Repositories. Your GitHub-connected repositories are cloned into the workspace, one directory per repo. Every git operation uses a short-lived integration token - no credential is ever stored on the machine.
- Toolchain. Each repository’s
.tool-versionsfile (asdf) is read and the pinned toolchains are installed - so the agent builds with exactly the versions your team pins, not whatever happens to be on the image. - External dependencies. If any repository carries a
docker-composefile, the Docker daemon is started so the agent can run your databases, queues, and other services in containers the moment it needs them.
Each step reports its progress live in the agent’s Status column, and steps that don’t apply are simply skipped - a repo with no compose file just means no Docker to start. If a step fails, the agent’s status says which one and why, instead of leaving you guessing at a half-built sandbox.
The next three sections expand on each step - what your repository should carry, and how the sandbox uses it.
Repository
A repository that’s ready for agents carries four small files at its root:
your-repo/
├── .tool-versions        # pinned toolchain versions (asdf)
├── docker-compose.yml    # external services the project needs
├── AGENTS.md             # how to work in this repo, for any agent
├── CLAUDE.md             # the same, read by Claude Code
└── ....tool-versions- the exact language and tool versions the project builds with, covered in Toolchain below.docker-compose.yml- the databases, queues, and services the project runs against, covered in External dependencies.AGENTS.md- working instructions for agents: how to build and run tests, code conventions, what to touch and what to leave alone. Codex and OpenCode agents read it automatically.CLAUDE.md- the same job for Claude Code agents. Keep one file as the source of truth and have the other reference it, so instructions never drift apart.
None of these are required - but each one you add turns setup an agent would otherwise have to figure out (or ask about) into something it just knows.
Toolchain
The sandbox pins its toolchain from your repository’s .tool-versions file -
the same file asdf
uses on a developer machine. One tool per line, exact versions:
erlang 27.2
elixir 1.18.4
nodejs 22.11.0
During bootstrap, every cloned repository’s .tool-versions is read, the
matching asdf plugins are added, and each pinned version is installed and
activated for that repo. A workspace with several repositories can pin
several different toolchains - each repo gets its own.
Why pin at all? Because “works on my machine” cuts both ways. An agent
debugging a failure that only exists on a newer compiler wastes its tokens
and your time; an agent that builds with exactly the versions your team and
CI use produces results you can trust. If your repo already has a
.tool-versions, there’s nothing to do - the sandbox honors it as-is. If it
doesn’t, adding one is a five-minute change that pays off for humans and
agents alike.
No .tool-versions file means the step is skipped and the agent works with
the sandbox image’s default toolchains.
External dependencies
Most projects also need services around the code: a Postgres, a Redis, a
message queue, a MinIO. Describe them in a docker-compose file in your
repository, exactly as you would for a human developer - if one is present,
bootstrap starts the Docker daemon during sandbox setup, so containers
are ready to run by the time the agent picks up its first task.
Agents don’t blindly boot the whole stack. They bring up individual services as the work demands them - the database before running migrations, the queue before an integration test - the same way a thoughtful teammate would.
Good practice:
- Use the same compose file your team already uses. The whole point is that an agent’s sandbox behaves like a fresh developer machine - one definition of your dependencies, shared by humans and agents.
- Keep services self-contained. Pin image versions and avoid depending on services outside the sandbox; each agent runs its own isolated copy.
- Put configuration settings and secrets in environment secrets - anything your compose file or app expects as an environment variable will be in place before services start.
The agents list
Each row shows the whole picture:
| Column | What you see |
|---|---|
| Agent | Avatar, name, harness pill, model pill |
| Host | Where it runs and its hardware spec - or “Local” for local agents |
| Usage | Spend, with input, cached input, and output token counts beneath |
| Owner | Who created it, and when |
| Status | Lifecycle pill: Provisioning, Bootstrapping, Online, Working (with the channel it’s working in), Suspended, Failed, Offline - and “attached to #channel” for agents created from a channel |
Click a managed agent’s View Details for the deep view: connection and activity, a context-window gauge (how full the agent’s context is, live), identity, provisioning state, and the VM itself.
Lifecycle
- Idle agents nap. After about an hour without work, a managed agent’s VM is suspended. Any new message in one of its channels wakes it - it resumes with full context, no re-briefing.
- Manual control. Suspend, Resume, and Terminate live on each row’s menu. Terminating an agent tears down its VM permanently - the confirm dialog means it: removed, destroyed, unrecoverable.
- Mid-task control. In a channel, Interrupt sits on the agent’s thinking line while it works; the avatar menu carries Interrupt and Clear context (fresh start) at any time - see the chat interface.
- Attached agents. An agent created from inside a channel belongs to that channel and is retired when the channel closes - see Channels.
Usage
The Usage column tracks each agent’s real token spend - reported by the harness when available, computed from the model catalog otherwise - so you can see exactly what each teammate costs. The dashboard rolls the same numbers up per person and per team.
Cached tokens New
Between the input and output counts sits a third number: cached input tokens, the part of the context the provider served from its prompt cache instead of re-reading. Hover it for the exact figure, split into cache reads and cache writes when the harness reports both. Cached tokens have always been in the dollar figure - now you can see how much of an agent’s context is being reused turn to turn, which is the first thing to look at when a long conversation is costing more than it should.